Content Source Link – Frontier Email Settings
Other related Article Link- Frontier Email Settings
Frontier Email Settings
On this page you’ll discover the Frontier email settings for Android. Other than an outline with the imap and pop3 server mail settings for Frontier, we offer you a far reaching guide for setting up your Frontier email on an Android gadget.
Quick steps to frontier email settings for android phone –
- Open your phone & choose the email app in phone.
- Now enter the details in your Frontier Email Settings for android that consist your email address and password. Next tap on ‘Manual Setup’.
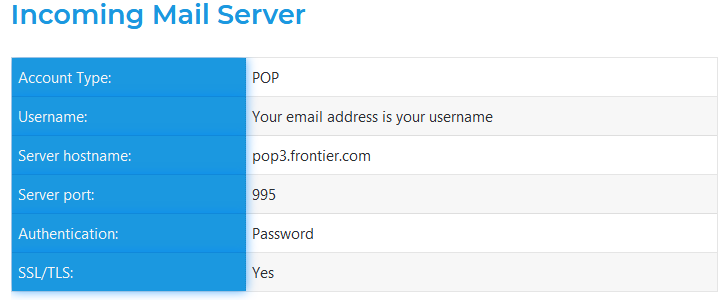
- Choose with the ‘POP3’ account settings and choose the following details:
* POP3 Server Setting— pop3.frontier.com
* Mail ID — Frontier email address
* Password option— Frontier password
* Security — SSL
* Choose with the ‘Next’ option & move next . - Enter with your outgoing mail Id details:
* SMTP Server Id — smtp.frontier.com
* Security — SSL
* Port Value — 465
Frontier Mail Server Settings
Steps for the Frontier Mail Server Settings
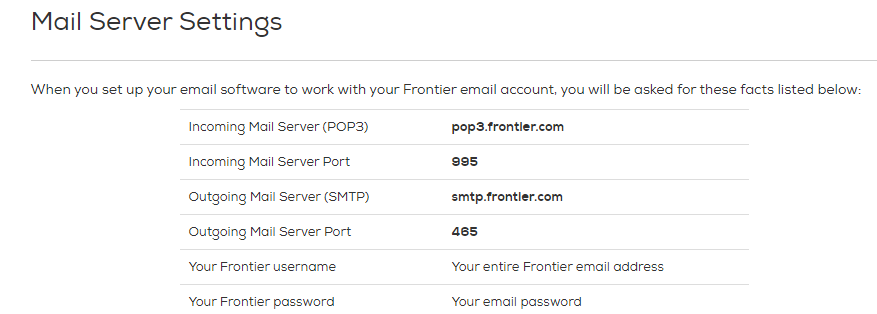
If you are looking for the steps of Frontier mail server settings with the frontier email you should know the following settings:-
- For the ‘Incoming mail server’ choose ‘pop3.frontier.com’
- For the ‘Incoming mail server’ Opt to port value = 995
- For the ‘Outgoing mail server’ choose ‘smtp.frontier.com’
- For the ‘Outgoing Mail Server’ Opt to port value = 465
- In the user name give your user name
- In end put your ‘Frontier email id password’
The above blog states two different frontier settings
1- frontier email settings
2- frontier mail server settings

1 Comment